Showing posts with label Information Gathering. Show all posts

Friday, March 9, 2012

METASPLOIT AUXILIARY PORT SCANER

Auxiliary is ones of many kinds metasploit module, the auxiliary modules such as ssh_login can take a known list of usernames and passwords and then attempt to log in via brute force across an entire target network.

Today I tried to learn about auxiliary scaner in my virtual labs. Open the metasploit and search the auxiliary.
Show Auxiliary
And then use the scaner, in this phase selected the tcp port scan. By show options you can know what should the set up. Set the ip target to RHOSTS and run to starting the scaner.

Runing scaner
Look the picture above, its all about the open port in the ip target.

Friday, February 10, 2012

IG TASK

Got the error and hank..Why? my notebook over heat im forget to bring the fan...Oh

Wednesday, February 8, 2012

SHODAN THE AMAZING SEARCH ENGINE

SHODAN is a search engine that lets you find specific computers (routers, servers, etc.) using a variety of filters. Some have also described it as a public port scan directory or a search engine of banners.
SHODAN also lets you use boolean operators (‘+’, ‘-’ and ‘|’) to include/ exclude certain terms. By default, every search term has a ‘+’ operator assigned to it.
In addition to boolean operators, there are special filters to narrow down the search results.

SHODAN queries related to vulnerable servers, systems, and applications. To use shodan you must register your account at www.shodanhq.com      
Some also describe it as a container scanner search engine directories or banners, Shodan index most of the data taken from the 'banner', which is the meta-data server sends back to the client. It can be information about the server software, which supports the choice of services, a welcome message or any of the clients want to know before interacting with the server.

Tuesday, February 7, 2012

EXPLOIT WEBMIN USING EXPLOITdb TO HAVING PRIVILEGE ESCALATION (part1)

Day 6

Tools :
  • Nmap
  • Nessus
  • Exploitdb
Target : Finding user account from 192.168.0.21

Victim
 
First time, Information gathering by scanning target using Nmap. And we have some information from the victim like list of open port and service enumeration fom victim.

IG Nmap scanner
Next, we use Nessus to scanning the vulnerability from victim

Vulnerability with Nessus
Showing three medium vulnerable from open port, you can see the description of this vulnerable service. 

Description of Vulnerable Service
By known in the phase Information gathering, service enumeration and vulnerability assesment. I choose open port 10000 with vulnerable service webmin.  Lets Go to using exploitdb to exploit victims system, search the exploit from the vulnerable services.

Search exploit
 In this list, i choose and copy webmin arbitrary file disclosure exploit (perl) to directory /home. Lets see in the directory home and than excecute.

Exploit
Exploit /etc/shadow
In this picture above the exploite target is /etc/shadow, why? because in the /etc/shadow store all user account (username and password). You can see list of username and encrypted password and after success exploit it i am copying file /etc/shadow to my /home directory with the name file goalexploitdb. in /home directory I tried to break up several user accounts from goalexploit into a many filename with the name pass, pass1, pass2 and pass3.

goalexploitdb in my /home directory
Its Nice day...Next post is the part of this session..


Wednesday, February 1, 2012

How To Install Nessus In Backtrack 5

Days 3
Today, from newbie and a cup of coffe i will be explain how to install Nessus is open source tool for identifying vulnerabilities both configurations error and software bugs, of which the former is more prevalent with network devices.

Open konsole and type this comand :
If the download installation success, next step you must be registration for adding new user. Add user by go to Menu > Vulnerability Assessment > Vulnerability Scanner > Nessus > Nessus Register
 
 
Go home for nessus home page and than you must be agree of the rule agreement for using nessus. After this session you must registration your mail address and go to cek email verivication code from nessus. I you are lucky and success registration lets copy your register code from nesus in the konsole like this.


After enter the registration code and please wait this session. Maybe you can see the process downloading by use bmon (Bandwidth Monitoring) to known the download activities.
 
 
If you are lucky boy you can see this picture, 
Next

 
And you must go to the browser, in this time i am using mozilla. Type localhost:8834 or 127.0.0.1:8834 to starting vulnerability assessment scanner (nessus).
 
 
Nessus is running and already to use....

Tuesday, January 31, 2012

Information Gathering and DNS Analysis For Web Applications

Day 2 Information Gathering For WebApp

DNS ANALYSIS 

Target :
is2c-dojo.com
is2c-dojo.net
spentera.com


1. Testing for www.is2c-dojo.net
Using ping to known the Ip Addreess for this site.


Using NSLOOKUP to known server address


Using APNIC
APNIC (Asia Pacific Network Information Centre) You can known RIR (Regional Internet Registry) from the target.


In the pictures showing completely information of this target.

dnsenum

Apps -> Information Gatherin ->  Network Analysis -> DNS Analysis -> dnsenum

By the picture you can see list of command for using dnsenum,

Test with comand ./dnsenum.pl is2c-dojo.net  not more information we can get with the command. Lets use other command line.

Not more information we known.

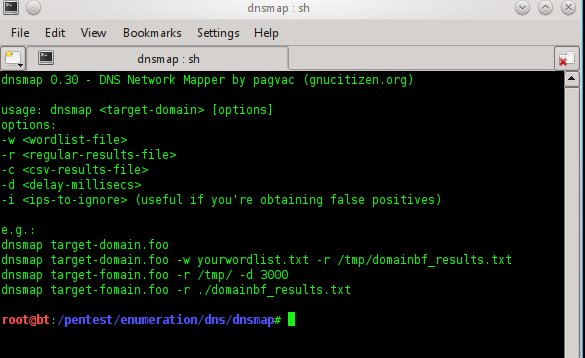
dnsmap

Apps -> Information Gatherin ->  Network Analysis -> DNS Analysis -> dnsmap


dnstuff
By using dnstuff in the web, the lack of stadards and centralization among WHOIS services further limits its usefulness.


Known information from this website tool we can get information like using WHOIS in the konsole but the dnsstuff showing map of the target registered.

2. Testing Target www.is2c-dojo.com

First step with ping and traceroute 


Ok, we can known the Ip Address target, in the next step scanning using dnstracer.

dnstracer
Apps -> Information Gatherin ->  Network Analysis -> DNS Analysis -> dnsmap
dnstracer comand :


Lets see by scanning the target we known information domain and subdomain trees with ip range for this target registered.


In the picture above i try to get more information for ns2.partnerit.us but i can't tracing this target.


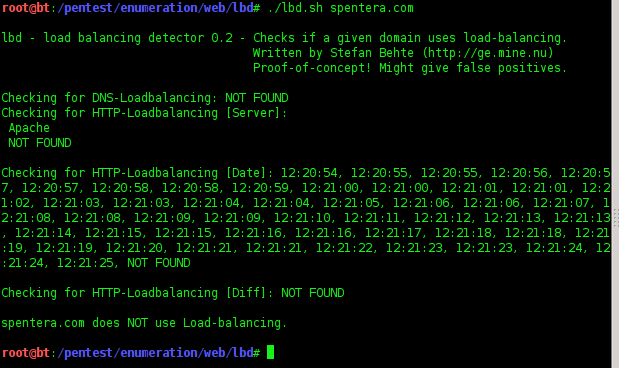
3. Testing Target spentera.com with lbd

Ping and traceroute the target to known the ip address for target.


In this session trying to use lbd other open source tools in the Backtrack 5

lbd is use to cek of load DNS Loadballancing and HTTP-Loadbalancing but its not a good reason what i means, the DNS loadballancing not found for target.

Information Gathering Using Nmap, Autoscan, Zenmap

Day 2 

BASIC INFORMATION GATHERING 

I am sorry if my english not fluently.
The basic rule for learning penetration testing is understanding step by step the pyramid phase :
  1. System undercontroll
  • Information Gathering
  • Service Enumeration
  • Vulnerability Assesment
  • Exploit
  1. Controlling system
  • Backdooring
  • House Kipping
  • Rootkit

Basic Information Gathering

The ultimate output of this step is a list all information from the system. Information gathering is the process of understanding structure of the target. Information gathering have pasive and active. The pasive infrmation gathering is never touch the live system and active information gathering in the process be in contact with system. In the active information gathering is difference by active and pasive. Pasive example using search engine to get information of target and active example using tools to touch system to get information.

Tool of Information Gathering are :
  1. Active : Nmap, Zenmap, Autoscan, Netifera,.etc.
  2. Pasive : Google, Yahoo, Bing,Shodan,Wireshark.etc

Information Gathering object for web application to learn as much about target, its business, and its organizational structure as we can. The output is a list of DNS domain names, reflecting the entire target, including all brands, divisions and local representations. By footprinting to mine as many DNS host name as posible from the domains collected and translate into ipaddress ranges and than you can verification with DNS ownership and list of ip address range to verify by other means that they are indeed asociated with target. Using tools PING, WHOIS, TRACEROUTE, SEARCH ENGINES, NSLOOKUP and various tools you can get information of target. If we get information output from target in the phase Information gathering lets to the next step phase is for Service Enumeration.


Service Enumeration

What is Service Enumeration?, Service Enumeration is a fancy terms for listing and identifying the specific services and resources that are offered by a target. By starting with a set of parameters like Ip address range, Domain Name Service (DNS) and open port on the system. Goal for service enumeration is a list of services that are known and reachable from the source. With the list of service we can go to deeper scanning, the core of this scaning is penetration testing. Tools for scanning in this phase are : Autoscan, Nmap, Zenmap, Netifera, Wireshark (analysis), scapy, maltego and various Open Source tools for scanning

In the bottom is a litle list for scanning tools :
Nmap.

Scanning system and port / services list of Ip address in the network by using command lines
Nmap -v -n PO -sS -p 1-65535 192.168.56.10/24

test1
 
If you can see the “host down” its means the ip address is not use or a live. Nmap scanning port / services list of Ip address range in the network by showing open port. Looking for above screenshoot it is nice from the Ip address 192.168.0.21 we can get information about open port and services.

Next we try to scanning other ip address in the list, scanning with ip address 192.168.0.91 . Scanning type of packet sent TCP Syn packet, print version number and enable OS detection.

testing2
 
Zenmap

Zenmap is another tools for Information Gathering and Service Enumeration with GUI interface, lets to try scanning the target list Ip address in the network. 
Testing 1
 
Resault of the scanning list Ip address range show in the above, we can known if the Ip address 192.168.0.21 showing information open port / services, Mac Address of machine, device type, OS version, TCP sequence predition, service info, host script result. Lets see more scanning with this tools.


Looks the next scanning screenshoot in the bottom. In the bottom result of opening port, protocol, services and version.


Next, result showing network topology.


Hosts viewer


In the above is showing host details result of scanning ip address 192.168.0.21 in the network 

Autoscan

Auto scan is a one of many kinds tools GUI interface for scanning service enumeration. In this session scanning with same network.
 

To start using autoscan you must add a netwok what you will be scan. In this session I use local network with subnet mask 255.255.255.0. Connect to the host.
In next picture showing all live Ip address in the network


In this picture above autoscan showing all live ip address in the netwok . To activated intrusion alert mode you can get information if other human (other ip address) try to intrusion your system, look the picture in the bottom, autoscan showing alert notification because human (intruder) try to scanning my ip address, known the ip address intruder is 172.26.227.254 with mac address. Other human with other class of ip address in the network.

The intruder shutdown the system